Getting Started
- Jeremy Agee
- David Jorm
Get a CloudRouter image
STEP 1
Obtain the latest Minimal or Full image from the CloudRouter Downloads. These images are in raw format and are compressed with xz
Download the image:
curl -o CloudRouter-4.0-fedora-minimal.raw.xz https://repo.cloudrouter.org/4/fedora/24/images/cloudrouter-fedora-cloud-minimal.raw.xz
curl -o CloudRouter-4.0-fedora-checksum.txt https://repo.cloudrouter.org/4/fedora/24/images/sha256sum.txt
Ensure the image's checksum is correct:
sha256sum CloudRouter-4.0-fedora-minimal.raw.xz
fd0998affb9cbaf4d3cc1f2074247b8b2e700be8fad20eb412a9d5ae32fd3af2  CloudRouter-4.0-fedora-minimal.raw.xz

cat CloudRouter-4.0-fedora-checksum.txt
fd0998affb9cbaf4d3cc1f2074247b8b2e700be8fad20eb412a9d5ae32fd3af2  cloudrouter-fedora-cloud-minimal.raw.xz
Un-compress the image:
xz -d -k CloudRouter-4.0-fedora-minimal.raw.xz
Cloud-init
STEP 2
The CloudRouter image ships without default credentials. The cloudrouter user is provided to manage the system and has sudo access, but no default password is set. The cloudrouter images are configured to load password and/or ssh key data for the cloudrouter user from a metadata ISO image attached to the guest.
Create your own cloud-init iso
Run the make-cloud-init-iso.sh script to create your custom iso image. The provided script will auto generate a password and a ssh key pair unless otherwise specified.
Fedora required packages:
sudo dnf install genisoimage python3
Ubuntu required packages:
sudo apt-get install genisoimage python3
Windows 10 required packages using Windows Subsystem for Linux:
sudo apt-get install genisoimage python3
Example script usage:
$ wget https://raw.githubusercontent.com/cloudrouter/cloudrouter/master/contrib/make-cloud-init-iso.sh
$ bash make-cloud-init-iso.sh --help
usage: make-cloud-init-iso.sh
optional: -pw [password] | --password [password]
optional: -np | --nopassword
optional: -nk | --nosshkey
optional: -k [/path/to/ssh/key.pub] | --key [/path/to/ssh/key.pub]
$ bash make-cloud-init-iso.sh --password "your_password_here"
[INFO] Using supplied password
[INFO] Generating rsa ssh keys ...
Generating public/private rsa key pair.
Your identification has been saved in /tmp/tmp.OVt3erUFeb/cloudrouter_rsa.
Your public key has been saved in /tmp/tmp.OVt3erUFeb/cloudrouter_rsa.pub.
The key fingerprint is:
b2:50:b1:6b:83:a6:06:46:9c:6a:df:4a:59:5a:33:9a username@hostname.localdomain
The key's randomart image is:
+--[ RSA 2048]----+
| . |
|. . o |
| + o |
|o o . |
|oo +== S |
|o..oOoo+ |
| oE .. |
| .. . |
| . |
+-----------------+
[INFO] Generating cloudrouter cloud-init iso ...
[INFO] cloudrouter user password: your_password_here
[INFO] Cloudrouter data writen to /tmp/tmp.OVt3erUFeb
$ ls /tmp/tmp.OVt3erUFeb
cloudrouter-init.iso cloudrouter_rsa cloudrouter_rsa.pub
Use the pre-configured cloud-init ISO
The cloud init ISO provided sets the cloudrouter account's password to "CloudRouter".
Please note: This ISO is provided for testing use only and should not be used in production.
Create a guest VM
STEP 3
virt-install - KVM using the CLI
Create and boot the guest:
sudo virt-install --accelerate --hvm --os-type linux --os-variant fedora23 --name CloudRouter-4.0-fedora-minimal --vcpus 2 --ram 2048 --import --disk bus=virtio,path=/var/lib/libvirt/images/CloudRouter-4.0-fedora-minimal.raw --disk device=cdrom,bus=ide,path=/var/lib/libvirt/images/cloudrouter-init.iso --network bridge=virbr0,model=virtio --noautoconsole
Attach to the serial console and login:
$ sudo virsh console CloudRouter-4.0-fedora-minimal
Connected to domain CloudRouter-4.0-fedora-minimal
Escape character is ^]

CloudRouter release 4 (Release)
Kernel 4.4.7-200.fc24.x86_64 on an x86_64 (ttyS0)

cloudrouter login: cloudrouter
Password:
[cloudrouter@cloudrouter ~]$ ip addr show
1: lo: <LOOPBACK,UP,LOWER_UP> mtu 65536 qdisc noqueue state UNKNOWN group default qlen 1
    link/loopback 00:00:00:00:00:00 brd 00:00:00:00:00:00
    inet 127.0.0.1/8 scope host lo
       valid_lft forever preferred_lft forever
    inet6 ::1/128 scope host
       valid_lft forever preferred_lft forever
2: eth0: <BROADCAST,MULTICAST,UP,LOWER_UP> mtu 1500 qdisc fq_codel state UP group default qlen 1000
    link/ether 52:54:00:fb:a5:3a brd ff:ff:ff:ff:ff:ff
    inet 192.168.124.168/24 brd 192.168.124.255 scope global dynamic eth0
       valid_lft 3539sec preferred_lft 3539sec
    inet6 fe80::5054:ff:fefb:a53a/64 scope link
       valid_lft forever preferred_lft forever
[cloudrouter@cloudrouter ~]$
Please note: In this example the guest was attached to the virbr0 bridge so it is using the hosts libvirt NAT network. If the host system has a bridge network such as br0 this can be used so other systems on the network can access the guest.
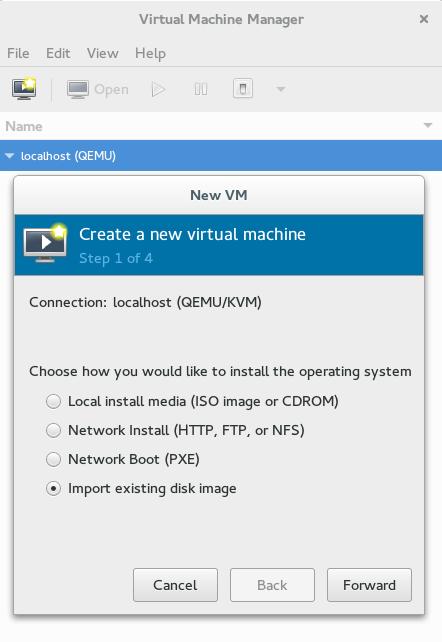
virt-manager - KVM using the GUI
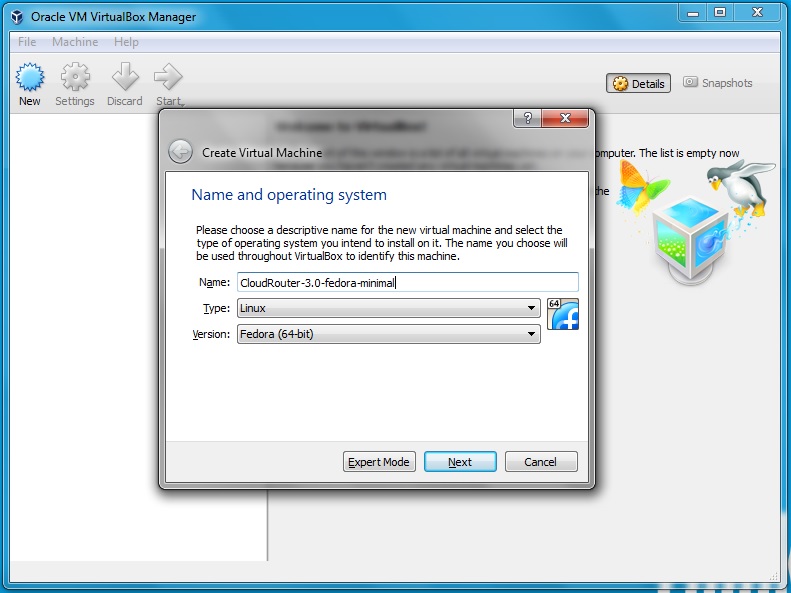
Create a new VM:
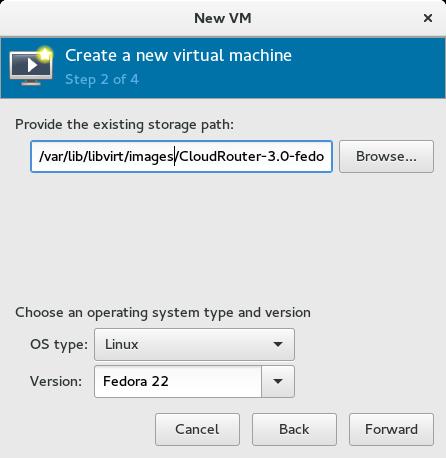
Select the uncompressed cloudrouter image:
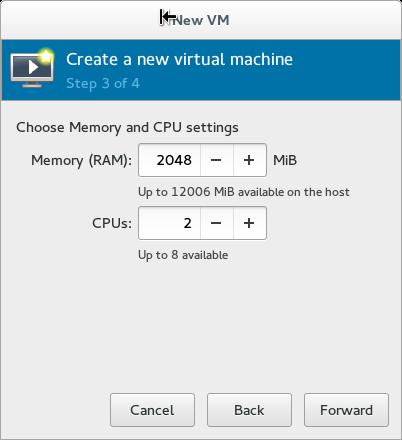
Allocate 2GB or RAM and 2 VCPUs:
Select customize installation and select the network bridge:
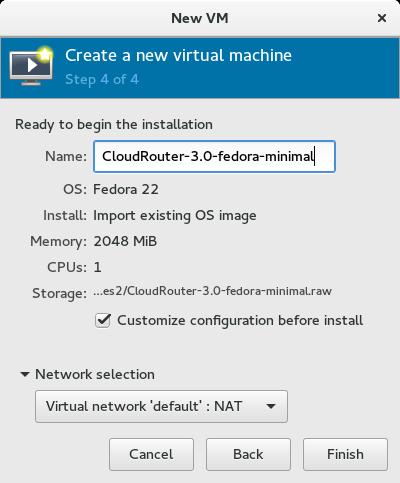
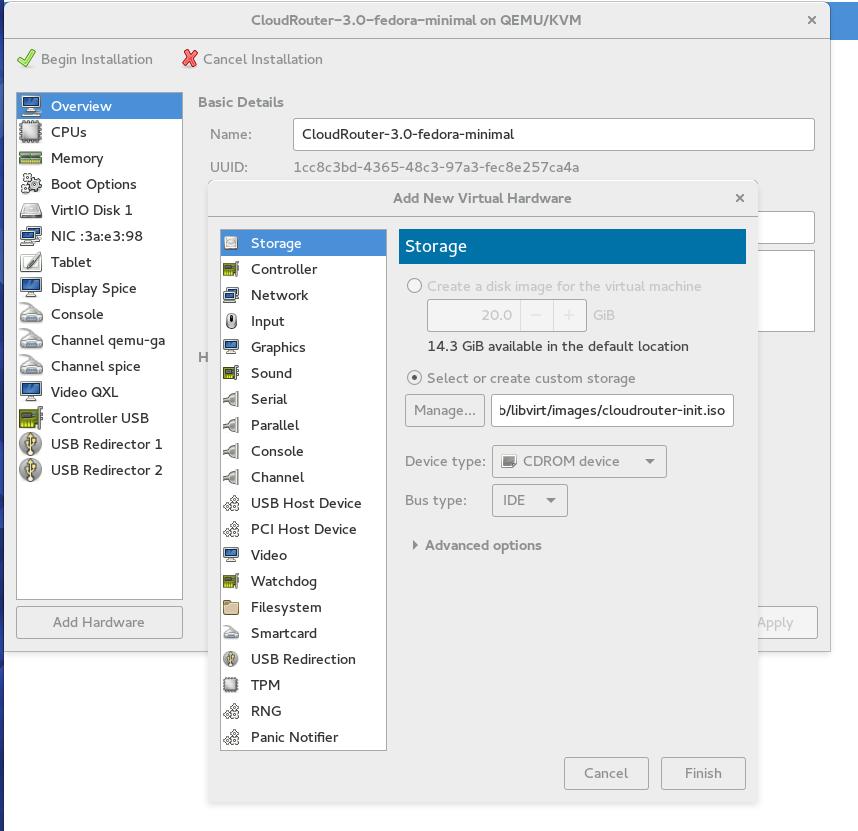
Add a CDROM device and attach the cloud-init.iso:
Login to the VM:
Login wth the cloudrouter user account and the password set by the cloud-init.iso. Please be aware that the guest will first boot and load the cloud-init data and reboot. On the second boot, the system is ready for use.

Virtualbox
Download the vmdk image from the CloudRouter Downloads page.
You will need to un-compress the image, 7zip is a good tool for this:
C:\"Program Files"\7-Zip\7z.exe e cloudrouter-fedora-cloud-minimal.vmdk.xz
Create the new vm in VirtualBox:
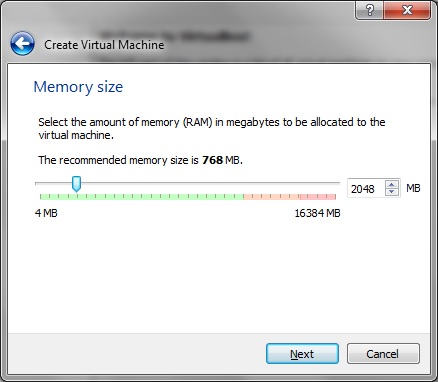
Set the vm to use 2GB of RAM:
Select the "Use an existing virtual hard disk file" options and cloudrouter vmdk image file from the harddisk:

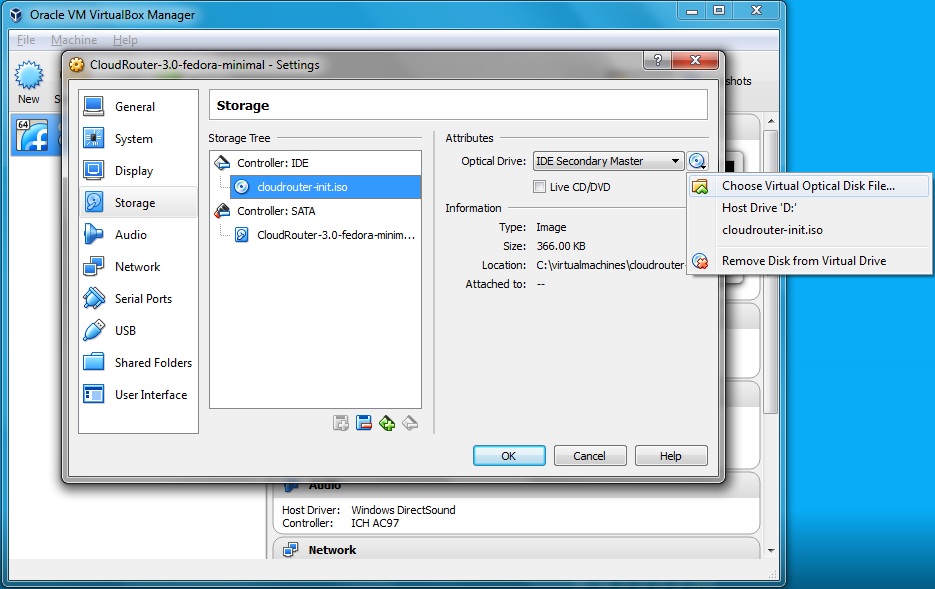
In the VM Setting(Ctrl+S) attach the cloud-init iso to the VM before first boot. This will be under the storage section of the left menu followed by the empty cdrom device. Select the "Choose a Virtual Optical Disk File" option and select the cloudrouter-init iso:
After the cloud-init iso image is attached booting the VM you can login using the cloudrouter login and the credentials that were loaded by cloud-init from the cloudrouter-init.iso.